Header Ads Widget

Ticker

6/recent/ticker-posts

What Is that????? The Reveal

Ok here the is cabinet with some of it's parts laying on the top.  A lot of you guessed this to be a stereo or old radio cabinet.  Nope!

This sweet cabinet is called an Expand-O-Matic dining table!! Yep those are the leaves on the top of this cabinet.  These were made back in the late 60's and early 70's.  The leaves stored in the inside of the cabinet.

The top draw pulls out and becomes the end of the table when extended.  As you can see the extension bars open up to any size seating from 2 to 12.  The leaves then fall into place and you have a table.
Here is one very similar to mine that I took off of pinterest.  You can see how it opens up to a full table.

These are the leaves before we sanded and painted them along with the middle table leg for support when the table is fully extended.

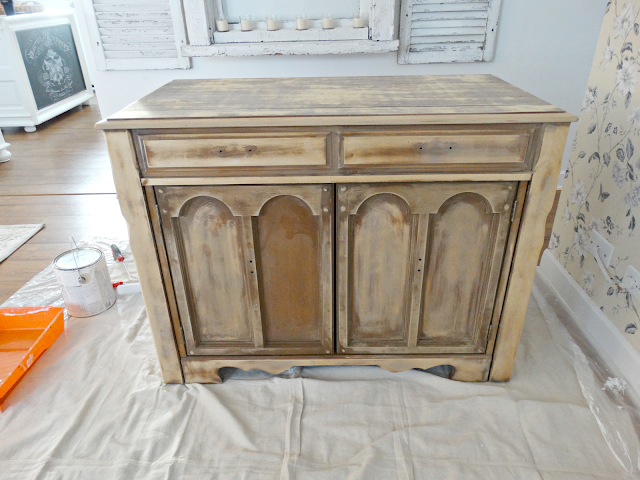
Terry sanded down the piece so it would take the cabinet paint.  Believe it or not I was planning on leaving this a light colored natural wood if it sanded nicely!  Nope it had sections as you can see that did not come out well from sanding.  Just years probably of poly and the different types of wood.  So white paint was going to take over!

We had to paint this inside due the house due to the cold weather we have here in Illinois.  However,  the sanding part was done outside in the garage!  Sorry Terry but trying to clean up all those fine dust particles for the next three months was not going to happen!  So outside this piece went to get her sanding.

My living room then became a painting room for the cabinet and all her parts.  

We used Lowe's special cabinet paint.  I love this paint.  It is specifically made for painting cabinets.  No primer needed.  It goes on like glass and the cabinets hold up very nicely.  We have used this cabinet paint on the kitchen cabinets and they still look great like the first day we painted them.  You can tint this to any color you want including the 100's of white shades.  I just use the semi brilliant white that it come in.

As you can see in this before pic the bottom of the cabinet was ok but I felt a little dated.  So Terry and his tools took some left over molding from when we made the island and finished this to make if feel more updated.  You can see this in the next picture.

Please excuse the grainy pictures but if I wait for good light and a sunny day it might be April to show you this piece finished!
I added new hardware for the upper drawer and left the hardware that was on the doors below.  Just gave them some white paint and sanded them for a distressed look.


The leaves all store nicely in the cabinet.  There is still room on the other side that I will put some serving pieces and a table cloth or two. 

Here is what the table looks like when you pull out the faux drawer.  You can see the mechanisms that pull out for each leaf.  This table expands to fit up to 12 comfortably.


I put in about 4 of the leaves to show you how this works.  They slip in and have little pegs that fit into the holes in the next leaf so the fit nicely together.


I love this piece.  Since I do not have a dining room in this tiny house this gives me a dining room table to entertain my guests when needed.  Then I can be put back away in this cute cabinet that does not take up a lot of space.

Oh how I wish I could get a better picture of this piece finished.  It really is pretty in this room and the finish came out really nice.  I guess that is the draw back of living in the midwest during the winter!  Some days we see sun but this week we are not going to see much sunshine.

Hope all of you are having a wonderful week.
Just trying to stay active and not feel the winter blues with no sun.

Have a great rest of the week.
Kris

Yorum Gönder

0 Yorumlar